ECS 162 Assignment 5
Please submit by midnight, Friday May 18, using Canvas.
We will accept submissions by teams of at most three.
Everyone in the team should submit the same files, and
will get the same grade.
Please begin by copying testWHS.html, testWHS.js, testWHS.css to
testWHS2.html, testWHS2.js, and testWHS2.css, and also SnDserver.js
to SnDserver2.js. Work with the "2" versions of the files in this
assignment. This will help us with grading Assn 4.
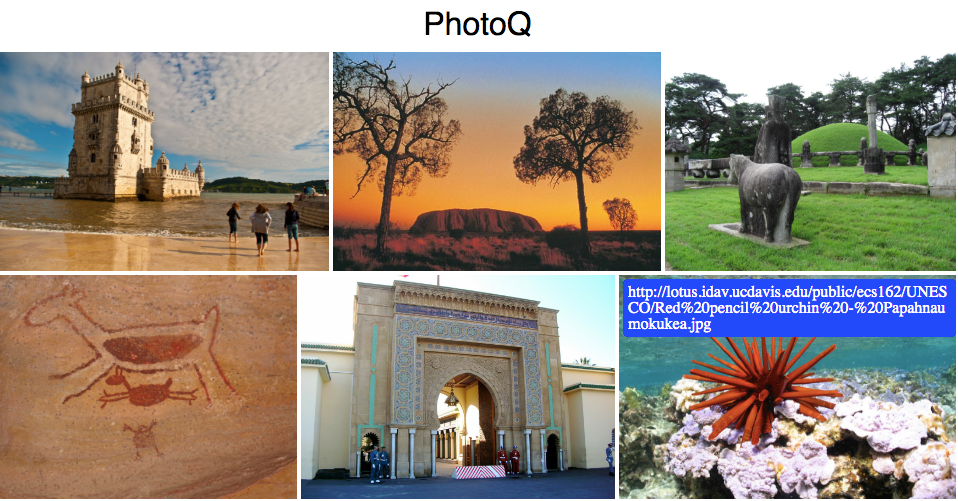
In this assignment we continue development of our PhotoQ app.
We'll add in the database,
make a new AJAX query to get a collection of photos given
a list of ID numbers, and
and work on the front end, adding a
React component to handle the fancy photo layout.
(We'll put off contacting the Google Cloud Vision API until after Midterm 2).
Note: The database here replaces the array imgList from the last
assignment. Your code for this assignment should NOT include a
global array to look up photo names. Our goal this week is to learn
how to do that with a database.
To set up the database, we will write two
node programs that run on our server machine server162.site,
but which are not part of the actual
Web server code.
Instead, they will get the database ready for the Web server code to use.
-
First let's start working on the database, using the
sqlite3 module.
Our database will have one table, with a row for ever photo filename.
Here is a starter program createDB.js, that
sets up a database with one table.
The table contains only one column, an ID number.
Change it so that it includes
- a unique ID number (int),
- a photo filename (string),
- width of the photo (int),
- height of the photo (int),
- a location tag (string),
- a comma-separated list of tags (string).
See the lectures from 5/9 and 5/11, which made a table with 4 columns;
you need a table with 6 columns.
Run createDB.js (using node) to create an empty database with your
six-column table.
You should see the database file PhotoQ.db appear in your server directory.
-
Next, let's get the file names into the database.
Write a second Javascript program, loadNames.js, which reads the short testing file
6whs.json, and, for each filename in the list, adds a row to the database, with a unique ID number,
the filename, the width, the height,
and two empty strings for the landmark and
tags fields.
You can use the
image-size module
to get the width and height
of every image (see the example code under "Using a URL").
Notice you'll need to use the
database callbacks to make sure every row has been added before you dump out
the contents.
Rather than writing one row, waiting for the callback, writing the next, waiting for the callback,
etc, I suggest you write all the rows in a for loop, and then count the callbacks until you know they all are done.
The function getSize from the 5/14 lecture should
be useful.
To test your program, you can use
this function,
which prints out the
whole database (or look at it using sqlite3 from the command line).
-
Add an AJAX query that lets the user send a list of id numbers and returns a list of objects, each object containing a { fileName, width, height }.
Change SnDserver2.js
by cutting out the global variable imgList and the function
loadImageList; instead, get the information to answer each query
from the database.
In your dynamic server code, detect queries of the form:
http:server162.site:####/query?numList=3+54+725+6
where the list of numbers in the query can have any length and the numbers are between 0 and 988.
For each number in the list, get the photo filename out of the database using the SQL SELECT command (and db.all).
Send a JSON file containing the list of images back in the HTTP response.
-
Change the browser code so that the user can enter a list of numbers, separated by commas, and the
browser sends an AJAX query to the server (using the format above) to fetch a list of file names, widths and heights.
For now just print the file names on the console.
-
Now, let's get working on the UI. The fancy photo gallery layout comes from this React component.
Here is an example using the the photo gallery component from Javascript:
You can run this mini-app by putting all five files in your /public
directory. The last two contain the photo gallery component we are
using, and the first three give an example of how to use it.
Now,
instead of printing the filenames returned by the AJAX query
on the console, display the photos using the gallery.
To do this, integrate this gallery code
into testWHS.html and testWHS.js,
and display all the photos in the list returned by
your new AJAX query with this nice gallery layout.
You can stick with three images per row; the bottom row might have
fewer, if the number of photos is not a multiple of three.
-
Make the UI look more like Dana's drawings,
available in this zip file.
You do not need to implement any the autocompletion of the tags, or
search for tags - we don't have any tags yet -
but do make the rest of the page match the design.
Note that to change the number of colunms in the photo gallery (she shows
two), you can add the property "columns: 2" to the React.createElement
command for the Gallery component.
Since this is a Gallery property, not CSS, we can't change the number
of columns with a media query.
Instead, the width of the window can be found in
document.documentElement.clientWidth or window.innerWidth.

